

There are lots of you out there who have probably installed Zoom, the video communications software that lets you conduct business, hang with friends and keep contact over the internet using a webcam and a microphone. And there are those who, like me, use OBS which is Open Broadcaster Software to record and stream video. There has also been a lot of confusion about how to integrate the output of OBS to the input of Zoom to allow more engaging presentations. We’re here to tell you about a protocol that, although it’s been around for a while, is really starting to pick up steam in the consumer space and it’s an answer to your OBS / Zoom questions.
History of my experience with NewTek

The Video Toaster from NewTek
Way back in 1985 a company called NewTek was created. Its founders, Tim Jenison and Paul Montgomery released visual imaging software that I, along with many other Commodore Amiga owners, bought and used. That’s right, I’ve been a NewTek user since they released Digi View, a color video digitizer and Digi Paint, a paint program that allowed you to create and edit images in a staggering 4096 colors on screen, which in 1985 was friggin’ huge!

Babylon 5 scene created with Lightwave 3D
NewTek went on to pioneer a ton of amazing software and hardware packages over the next decade, including a broadcast quality switcher called the Video Toaster. This thing could do what systems costing nearly $100 thousand dollars could do for only 4 thousand dollars. In fact, the package included a 3D modeling program called Lightwave that was used to create some of the space battles and effects in the popular science fiction series Babylon 5. It was what they called “a paradigm shift” (paradigm shift) in the broadcast industry. I also owned a Toaster and absolutely loved it. And did productions that were absolutely terrible.
From Toaster to TriCaster
Fast forward, the year is 2005.

TriCaster
Although the popularity of the Amiga died down, NewTek continued with their line of broadcast switchers. The Tricaster was born. The name is based on its functionality allowing it to broadcast, record and internet stream all at the same time. This was an evolution of their Video Toaster system and they’ve produced a ton of them.
I was heading up a team that did live streams for dance events and we used a Tricaster at every show. I also lead a sort of news/interview program on YouTube that was a four camera shoot, with live guests and Skype interview sessions. It was the Tricaster that allowed us to capture our laptop computer displays and show them directly over our local ethernet network. This was HUGE, since we didn’t have to run long HDMI cables or install crazy capture cards. This was my first exposure to their amazing NDI technology, and it wouldn’t be the last.
Back to recent times. I’m doing mostly post production here at Pixel Valley Studio, but I still tinker around with things like OBS for my side game streaming hobby. In looking for ways to capture screens from other computers and smartphones into my OBS output, I noticed a plugin for OBS called obs-ndi. NDI and NewTek are back in my life once again.
NDI
NDI stands for Network Device Interface, and it’s the protocol developed by NewTek for broadcasting high quality video and audio over an internal gigabit network. There’s a ton of additional technical information that video geeks love, but I’ll leave that up to you with links in the description below if that’s what you want.
NDI allows broadcast quality video and audio delivery over a network. So this means you can:
Use software like OBS and receive video and audio from other computers to record or stream
Install it on your mobile phone and use them as extra cameras
Monitor multiple computers on a single PC
NDI is a bi directional protocol, meaning that data can not only be sent from one machine to another like rtmp or rtsp, it can be sent back again allowing control of PTZ cameras and tally lights
Side note, but because I know you want to ask, yes, there are cases where you can use NDI over a WiFi network, provided the router is capable and at least one of the computers is on an ethernet cable. But WiFi use cases are better suited for NDI | HX which is a variant of NDI that NewTek developed specifically for wireless transmissions.
OBS - NDI - ZOOM
So now that we know what NDI is and why you want it, here’s a great use case that might inspire you to install and use the freely available tools that NewTek provides. Let’s ge the output of our OBS install to send that video and audio directly to Zoom.
Install NDI Tools
First we need to go to ndi.tv to install the NDI Tools suite of apps which are available for both Mac and Windows platforms. I’ll be doing the Mac install here.
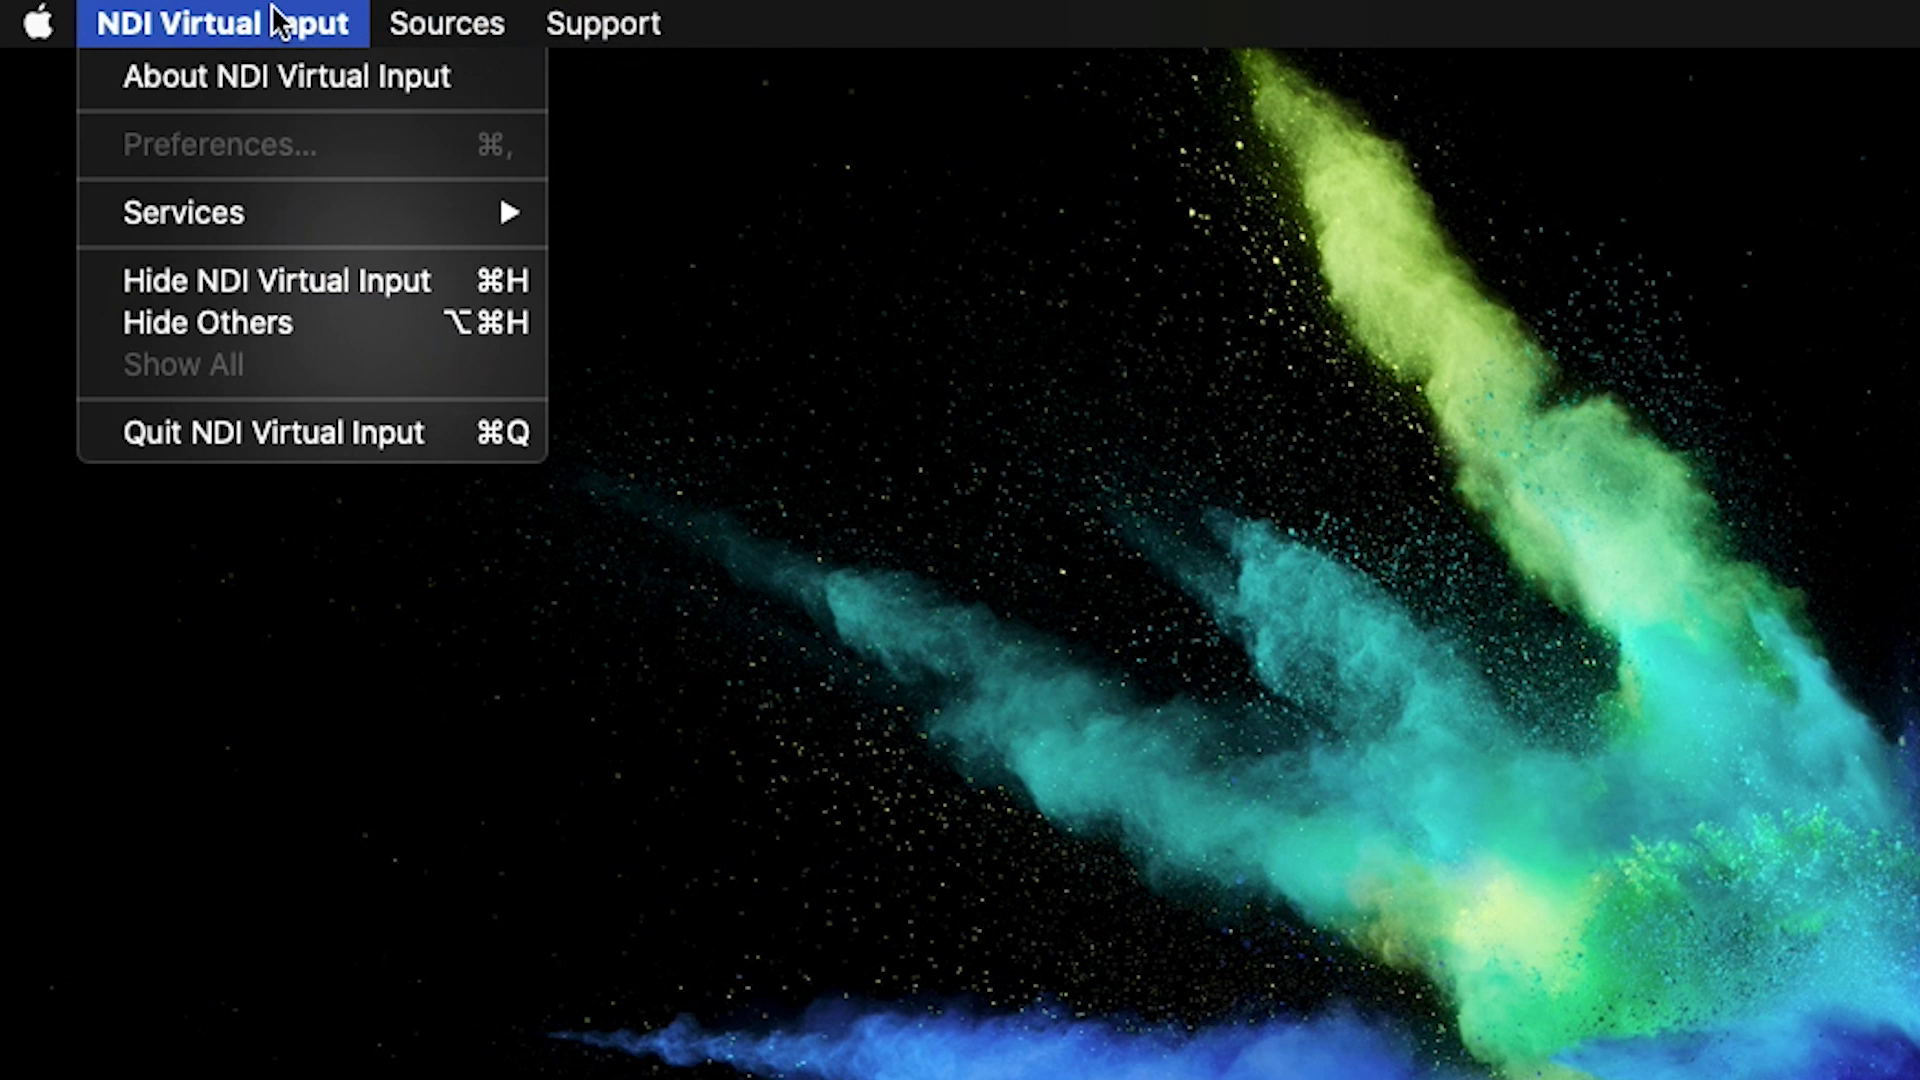
NDI Tools comes with a bunch of applications for various NDI uses, but the one we want to look at for this case is the NDI Virtual Input. Scroll down the page and click on the link for the download. Unzip the package and you should see an app called NewTek NDI Virtual Input. This package installs an NDI Virtual Input, which looks to your system like a simple webcam.
Once you run it, you will see the NDI option show up in your taskbar or menu bar. Now, unless you have software running on your local machine or local network that is outputting an NDI signal, you won't see any sources. Let’s fix that.
Open OBS
If you haven’t installed OBS, download and get it running. I won’t be going into detail on OBS, that’s another video, but I will show you how to get it to output your program scene via NDI.
For this to work in OBS you will need an external plugin called obs-ndi. Link in the description below. This must be installed so OBS can use the NDI protocol to capture and broadcast NDI audio and video.
Jump to the GitHub repository for obs-ndi and download the latest version for your computer. As of this recording, we are using v4.9.0. Once installed, you may have to restart your system. But when you run OBS you should see a new option in your Tools menu titled “NDI Output settings”. Click that.
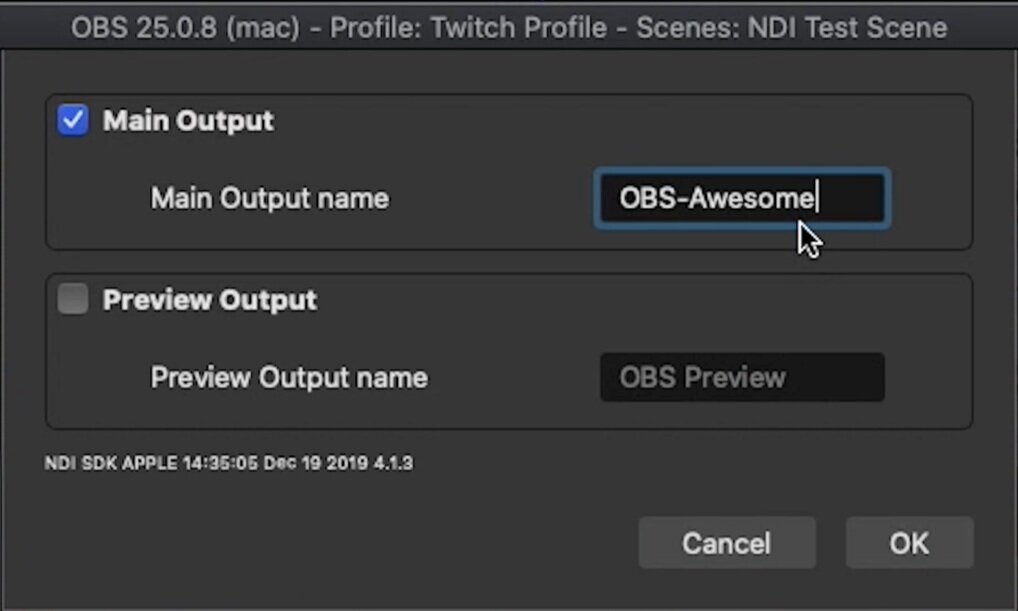
You will see a window like this, with Main Output and Preview Output checkboxes, along with the ability to edit the name. Checking either of the boxes will send the main or preview output of OBS to NDI on your computer and broadcast it over your local network. As long as that is checked, it will send output whenever OBS is running, so don’t forget to uncheck it if you want to save network bandwidth. This is all you have to do on the OBS side. So any production you do in OBS is now being sent to any listening NDI application. Let’s get the final part set.
Install and run Zoom.
If you already have Zoom installed on your system, go to the Zoom menu and choose “Check for updates…” We want to make sure that we are running the latest version.
Once you have Zoom, OBS and NDI Virtual Input all running together, now is the time for the magic.
Make sure that OBS is sending something and that Main Output is enabled. Go to your task bar or menu bar and click NDI. You should now see a name that looks like the name of your OBS NDI output. Click it to select its stream.

Choose NDI Video
Finally, open Zoom. We don’t need to be in a call, we can just check if it’s working by going to the Settings and Video. You will see a new “camera” appear in your list of available cameras, called NDI Video. Select that and you should see the output from OBS appear in your Camera test window. Magic!!
You can do the same with the audio in Zoom. NDI sends video as well as audio together. So long as you are sending audio from OBS, it will be sending over NDI.
In Zoom, you can choose to use the audio input under Microphone called “NDI Audio”. This will be the audio feed from OBS.
That’s it. Your amazing production from OBS will be seen in your Zoom conferences and you don’t have to request screen share access or wait your turn.
Oh, one quick tip, if you want better audio, you should go back to settings in the Zoom app and go to Audio. From there click Advanced and disable the two “Background Noise” options. I find that the sound is a bit better with these disabled when you are using the NDI Audio.
Other uses for NDI
Like I mentioned, the NDI Virtual Input makes your computer think it has an additional web cam installed and you can select any live NDI feed to display on that virtual web cam. It can be on your local computer or anywhere on the local network. Here’s an example of a bunch of different computers on my local network, broadcasting via NDI. On a different computer, I am running an additional package that comes with NDI Tools called the NDI Scan Converter. This takes every display from the computer and broadcasts its screens as separate NDI feeds, allowing me to choose any one to view.
One other option is having NDI installed on your mobile device. NewTek offers NDI broadcast apps on Android and iPhone for free. These run over your WiFi network, so make sure it’s a fast one.
Hopefully you’ll see the awesome benefits of this flexible protocol. You can use it for free on your computers, and there are also NDI ready routers, and other devices available for purchase. I’ve got it running on pretty much every machine in my home and office. It’s just that easy.
For products used in our tutorials, check out
Our Amazon Affiliate Store https://www.amazon.com/shop/pullmyfocus